9 Best Free Software To Watermark Videos For Windows
Here is a list of best free software to watermark videos for Windows. Using these free video watermarking software, you can add text watermark and image watermark to videos easily. Some of these freeware also let you batch watermark videos. The watermark can be set at any location and different parameters can be set for watermarking. These video watermarking software can be used to set watermark duration and watermark timing. Apart from these, you can also set text font, text size, watermark transparency, text format, etc. These can also be used to make several other changes to videos, like: crop videos, resize videos, set borders, audio conversion, etc.
Note: Maintain a backup of the original file while adding watermark, as the process of adding watermark is irreversible.
My Favorite Video Watermarking Software:
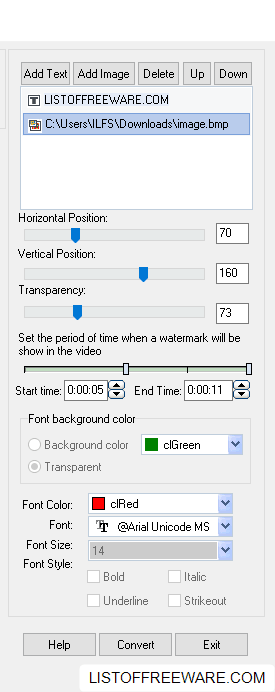
Out of these software used to watermark videos, I like Cute Video Watermark Free the most. It is due to the fact that, it is quite easy to use and requires no extra effort on your part. It has a number of features that let you add both text watermark and image watermark at the same time. Watermark can be applied at any location that you wish by making use of sliders. You can also set time duration for which different watermarks are to be displayed. A preview of video with watermark can also be seen.
You can also check out the list of best free Software to Batch Watermark Photos, Software To Add Watermark To PDF Files, and Video Editor Software.
Cute Video Watermark Free
Cute Video Watermark Free is a simple software which you can use to add text and photo watermark to videos. Text and video watermarks can be applied at the same time and you can also specify at what time which watermark is to appear and disappear. Using sliders, the position of watermark can be set along with timing of watermarks to appear in both the cases.
In text watermark, you are provided with extra option to change the font color, font, font size, font style, font background color, and font background color transparency.
How to watermark video using Cute Video Watermark Free:
- Open Cute Video Watermark Free and add video.
- Add text watermark or image watermark as per the requirement. Set its location and timings using the respective sliders.
- Choose the output format, output folder, click on Convert button and you are done.
It can also be used to convert video into various formats, like: 3GP. AVI, FLV, iPod, MKV, MOV, MP4, OGG, PSP, RM10, RM20, SWF, WMV, WEBM, M1V, and M2V.
Windows Movie Maker
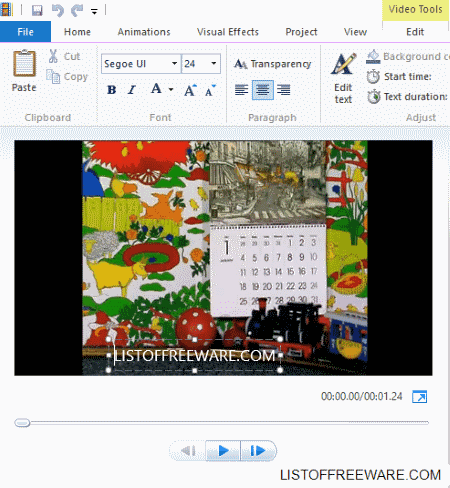
Windows Movie Maker is a freeware offered by Microsoft that can be used to create movies using audio files, video files, or images. You can also add text that can act as watermark for video. For this, you have to make use of the Caption option.
How to Add Text Watermark to Video using Windows Movie Maker:
Different caption parameters can be changed, like: font, text size, outline size, and outline color. You can place it anywhere on the screen by simple drag and drop. You can also apply effects to add animated watermark.
Start time and Text duration options let you control the time and duration for which the watermark is to be displayed. Video can be saved locally in various formats for different devices, or can be shared online on OneDrive, Facebook, YouTube, Vimeo, Flickr, etc.
Using 6.0 Version Of Windows Movie Maker, you can add image watermark to video as well.
How To Add Image Watermark Using Windows Movie Maker (older version):
- Open FX Archive.
- Click on the button Windows Vista Logo Locator.
- Chose the position, screen size, logo, enter logo name, and name of title.
- Copy the code generated below and paste it in notepad. Save it as XML file. This can be done by typing .xml after the name of the file while saving it.
- Go to the installation folder of Windows Movie Maker and open Shared folder. Create a new folder: AddOnTFX. On my Windows 10 operating system, the folder is located at C:\Program Files\Movie Maker\Shared
- Paste the XML file in the AddOnTFX folder and move the image to be watermarked in the same folder.
- Open Windows Movie Maker.
- Add a video to add watermark and go to Titles and Credits> Title on the selected clip.
- A new window appears where you can enter a Title. Click in the title text section, and simply press the Space Bar (to enter space).
- Now click on the button: Change the title animation. A list of animations appear along with the XML file that you added for watermarking video.
- Select and apply the changes, and you are good to go.
- Finally save the video as AVI or WMV locally. It can also be shared via email or burnt on CD.
Easy Video Maker
Easy Video Maker is a free video editor that can be used to watermark videos. There are certain personalization options that let you choose location, font, size, layout, and text style. Transition and effects can also be used if required. The preview of the video file can be watched with watermarks. It can also be used to batch watermark videos by adding image watermark. If required, motion effects can also be applied to watermark.
How to batch watermark videos using Easy Video Maker:
- Open Easy Video Maker and go to Function Modules> Make Videos in Batch.
- Add the files which are to be watermarked.
- Click the button, Add Watermark/Logo Onto All Checked Videos. Add the logo file, set position, logo size, transparency, etc.
- You can select object motion from predefined motions or you can add your own custom motion.
- Watermarked video can be previewed.
- Click on the RENDER button, specify the file location, and the watermarked video is saved to the desired location.
Some other actions, like: crop, split, join, etc. can be performed in batch on video files using this software. The video thus created can be saved as MP4, AVI, MOV, WMV, ASF, MPG, FLV, or MKV.
Any Video Converter
Any Video Converter (AVC) is free software to batch watermark videos with text watermark or image watermark. It is mainly used as a video converter that can convert various video files to different formats and for different devices.
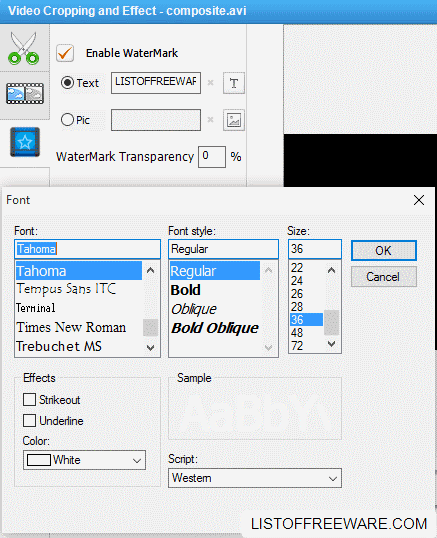
Text and image watermarking options have their own set of parameters to be changed. In case of text and image watermark, you can change transparency, location, etc. Text size, font, layout, font color can also be changed for text watermarks. You can also preview the watermarked video.
In case of batch watermarking, for each watermark to be applied, you have to set watermark options separately in each case.
How to Batch watermark video using Any Video Converter:
- Open AVC and select the video/videos to be watermarked.
- Go to Add Effects>Video Watermark, then choose whether to add text watermark or Pic watermark. Specify the text/image to watermark.
- Crop, rotation, and other effects can also be applied to a video along with watermarking.
- Repeat the process with other added video files (in case of batch watermarking).
- Click on Convert Now! button and the video(s) will be converted and saved to the specified output folder.
VSDC Free Video Editor
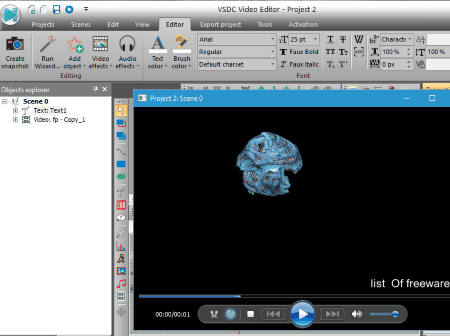
VSDC Video Editor is available as a freeware version that can be used to create and edit video files. It can also be used to create videos by either creating slideshow, importing media content, or capturing screen. Use it to add watermark to the created video files or existing video files. Add either text watermark, image watermark, or both to video files. There are some other effects that can be added to video files. A preview of the output can also be watched.
How to watermark video using VSDC Video Editor:
- Open VSDC Video Editor, create a new project and import the video that you want to add the watermark to.
- Add text watermark by clicking on the button Add Text. Change its properties, like: color, size, location, transparency, font, timing, duration, etc.
- Add image watermark by clicking the button Add Image. Change its properties, like: size, transparency, location, timing, duration, etc.
- Apply some other effects if required, like: motion, sound, animation, etc.
- Save the project as VPROJ or export it for various devices in different formats, like: AVI, MPG, MOV, WMV, MKV, RM, SWF, or FLV.
FFmpeg
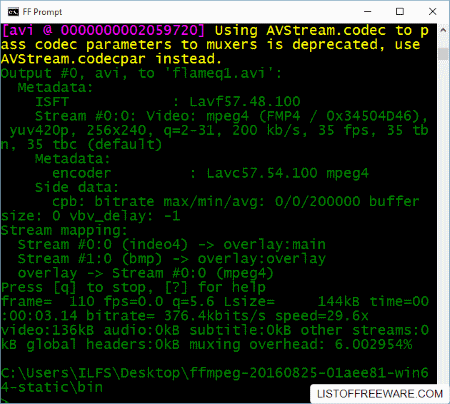
FFmpeg is a cross platform command line tool to add watermark to videos. You need to have a pretty good idea about the commands and how they are used to make use of this feature. It can be used to add text watermark and image watermark on videos. Using commands, set location, movement, rotation, etc. for watermark. The watermark can also be added at a position which is not covering the video. You can also animate the watermark image or text.
How to watermark videos using FFmpeg:
- Download and extract FFmpeg.
- Open ff-prompt.bat.
- Move the video to be watermarked in the bin folder of FFmpeg. Its located where you extracted FFmpeg.
- If you want to add image watermark, put it in the same bin folder.
- Type the following commands to watermark video.
Commands:
ffmpeg -i flame.avi -i image.bmp -filter_complex "overlay=10:10" flame1.avi
above command adds image.bmp as an watermark to flame.avi and saves it as flame1.avi.
ffmpeg -i flame.avi -i image.bmp \
-filter_complex “overlay=x=(main_w-overlay_w)/2:y=(main_h-overlay_h)/2” flame2.avi
above command adds watermark in the center of video.
ffmpeg -i flame.avi -i image.bmp \
-filter_complex “overlay=’if(gte(t,1), -w+(t-1)*200, NAN)’:(main_h-overlay_h)/2” flame1.avi
above command provides animated watermark.
It can also be used to encode, decode, record, convert, and stream audio and video.
For more commands, check out the documentation pages of FFmpeg.
VirtualDub
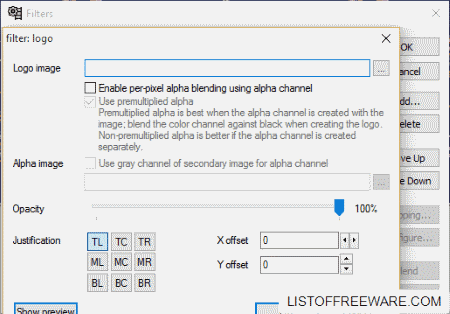
VirtualDub is a good video editor freeware to process videos and make numerous edits to it. You can also use it to add image logo watermark to video files. Watermark image can be placed at 9 different predefined locations on the video with some minor offset adjustments. You can also set image watermark’s opacity. Preview video before saving it. Various other editing can be done on videos with this freeware.
How to add watermark to videos using VirtualDub:
- Open VirtualDub and add the video to be watermarked.
- Go to Video> Filters> Add> logo.
- Select the logo image to be watermarked, then set its opacity, justification, and offset. Play with the advanced options if you know what you are doing. Apply some other effects if required.
- Finally save the video file in the required format.
You can also use it to perform some advanced editing as well, by making use of plugins or otherwise.
AVI ReComp
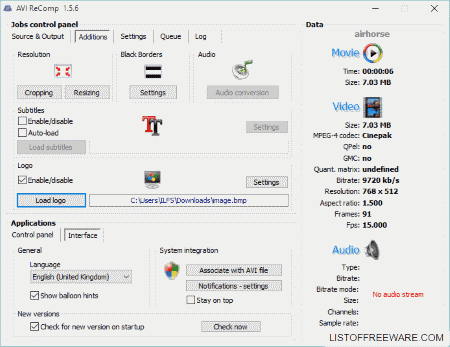
AVI ReComp is a freeware that can be used to add watermark to the AVI files. The final output is also saved as AVI. Here you can add logo as watermark. Set your watermark’s position, time duration, start time, fading, and transparency. Apart from that, it can also be used to add subtitles. You can also use it to crop, resize, perform audio conversion, and add borders. A preview of video can also be played.
How to watermark video using AVI ReComp:
- Open AVI ReComp, then select the input and output AVI file location.
- In the Logo section, Enable the logo function, then load logo file.
- Change the settings to specify time, position, and duration for the logo to appear.
- Preview and add the file to Queue for processing.
- Click on Start button to add image watermark.
Free Video Watermark Maker
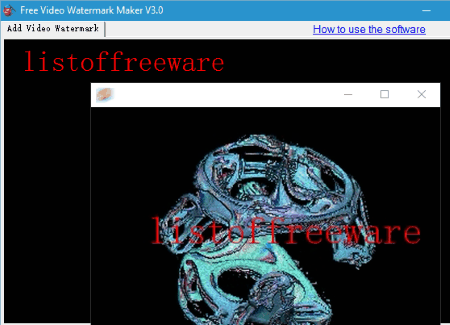
Free Video Watermark Maker is a simple video watermarking freeware. Both image and text watermarks can be added to video files. The watermark can be placed anywhere on the file. In text watermark option, you can change the font, font style, font size, text color, etc.
How to watermark videos using Free Video Watermark Maker:
- Open Free Video Watermark Maker, and select the file to which you want to add watermark.
- Select the option to either add text watermark or image watermark, and set the watermark parameters.
- Select the location of the watermark and preview the output.
- Select the output folder and click on Start button, then watermarked video is saved to the desired location.
About Us
We are the team behind some of the most popular tech blogs, like: I LoveFree Software and Windows 8 Freeware.
More About UsArchives
- May 2024
- April 2024
- March 2024
- February 2024
- January 2024
- December 2023
- November 2023
- October 2023
- September 2023
- August 2023
- July 2023
- June 2023
- May 2023
- April 2023
- March 2023
- February 2023
- January 2023
- December 2022
- November 2022
- October 2022
- September 2022
- August 2022
- July 2022
- June 2022
- May 2022
- April 2022
- March 2022
- February 2022
- January 2022
- December 2021
- November 2021
- October 2021
- September 2021
- August 2021
- July 2021
- June 2021
- May 2021
- April 2021
- March 2021
- February 2021
- January 2021
- December 2020
- November 2020
- October 2020
- September 2020
- August 2020
- July 2020
- June 2020
- May 2020
- April 2020
- March 2020
- February 2020
- January 2020
- December 2019
- November 2019
- October 2019
- September 2019
- August 2019
- July 2019
- June 2019
- May 2019
- April 2019
- March 2019
- February 2019
- January 2019
- December 2018
- November 2018
- October 2018
- September 2018
- August 2018
- July 2018
- June 2018
- May 2018
- April 2018
- March 2018
- February 2018
- January 2018
- December 2017
- November 2017
- October 2017
- September 2017
- August 2017
- July 2017
- June 2017
- May 2017
- April 2017
- March 2017
- February 2017
- January 2017
- December 2016
- November 2016
- October 2016
- September 2016
- August 2016
- July 2016
- June 2016
- May 2016
- April 2016
- March 2016
- February 2016
- January 2016
- December 2015
- November 2015
- October 2015
- September 2015
- August 2015
- July 2015
- June 2015
- May 2015
- April 2015
- March 2015
- February 2015
- January 2015
- December 2014
- November 2014
- October 2014
- September 2014
- August 2014
- July 2014
- June 2014
- May 2014
- April 2014
- March 2014
