20 Best Free Lightweight Screen Recorder Software For Windows
Here is a list of best free lightweight screen recorder software for Windows. These lightweight screen recorders are similar to standard screen recorder software that let you record the screen. The advantage of these software is that they do not take much space in memory and don’t put stress on your system resources, unlike standard screen recorders. Through most of these recorders, you can easily record the entire screen or specific portion of the screen. In some recorders, you can also record the audio with the screen feed. These screen recorders also let you specify recording parameters such as frame rate, recording codec, video quality, etc. After recording the screen feed, you can save it in AVI, MP4, MPEG, MPV, MKV, etc., formats. The process to record the screen is quite simple in all these software. Still, to help novice users, I have included the necessary steps to record screen in the description of each screen recorder.
In some of these software, you can also record the webcam feed. In addition to that, you can take screenshots of both screen and webcam feeds at any time. These lightweight screen recorders also offer some additional tools like Editor (to edit recording), Board (to record the annotation), Preview Player, etc. Go through the list to know more about these software.
My Favorite Lightweight Screen Recorder Software For Windows:
ScreenToGif is my favorite software because it can record any part of the screen, webcam feeds, and whiteboard annotations. Plus, it also offers a dedicated editor to edit the screen recording.
Screen2AVI is another good lightweight screen recorder that you can try as it can also record audio with the screen feed. Plus, it offers multiple hotkeys to simplify the screen recording process.
You can also check out lists of best free Lightweight PDF Reader, Lightweight Video Editor, and Portable Screen Recorder software for Windows.
ScreenToGif
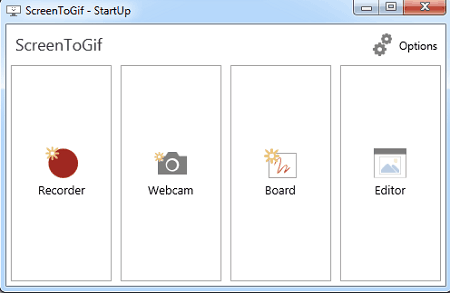
ScreenToGif is a free open source and lightweight screen recorder software for Windows. As its name implies, it is mainly designed to make GIFs from screen recordings. Although, it also lets you save the recording in AVI, MKV, MP4, WEBM, and WMV video formats. Apart from screen recording, you can also use it to record webcam feed and edit recordings. Now, check out the below steps to record screen using this lightweight screen recorder.
How to record screen using ScreenToGif:
- Start this recorder and click on the Recorder button to open up the recording window.
- After that, specify the screen area that you want to record by moving and enlarging the recording window.
- Now, specify the recording frame rate and then hit the Record button.
Additional Features:
- Editor: When you stop or finish the recording, this Editor area will automatically open up through which you can edit individual frames of the recording, add transition effects between frames, remove frames, add delay between frames, etc. After editing the recording, you can save it in multiple supported video formats.
- Board: It offers a virtual whiteboard over which you can annotate and record the entire process.
Final Thoughts:
It is one of the best free lightweight screen recorders through which you can record and edit webcam feed.
SCREEN2SWF
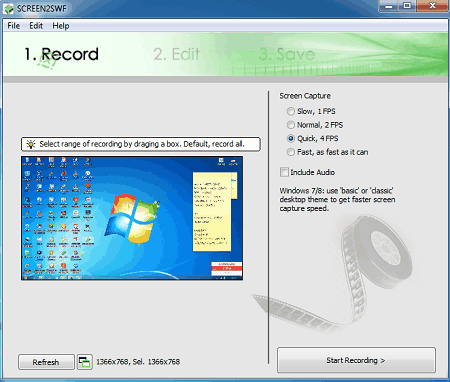
SCREEN2SWF is another free lightweight screen recorder software for Windows. As its name implies, it is mainly used to record screen and save it in the SWF format. Although it also lets you save the recording in EXE, FLV, AVI, and MP4 formats. After the recording, it lets you adjust the output quality and color range of the video. Apart from recording the screen, it also lets you edit the recording. Now, check out the below steps to record screen through this screen recorder.
How to record screen using SCREEn2SWF:
- Launch this software and select the area that you want to record through the cursor.
- After that, specify the frame rate and then press the Start Recording button to initiate the recording process.
- Once recording gets completed, you can go to its Edit section that lets you add annotations, images, video effects, etc., to the recording.
- Now, press the Done button and specify final recording parameters like video quality, color range, video title, etc.
- Lastly, select one many available output video formats (EXE, SWF, FLV, etc.) and press the Save now button.
Final Thoughts:
It is a feature-rich lightweight screen recorder software through which you can edit and adjust various parameters of screen recording according to your requirements.
FreeZ Screen Video Capture
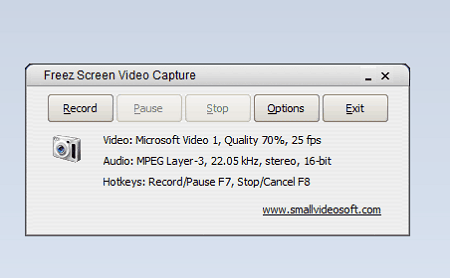
FreeZ Screen Video Capture is the next free lightweight screen recorder software for Windows. Through this software, you can quickly record the screen with or without audio. Like most other similar software, it also lets you specify the custom screen area that you want to record. It also lets you adjust some recording parameters (video quality, frame rate, and video compressor) before initiating the recording process.
How to record screen using FreeZ Screen Video Capture:
- Start this software and go to Options and specify video quality, video compression, and frame rate.
- After that, enable or disable the audio from recording and press OK to save settings.
- Next, click on the Record button and select the screen area through mouse to start the recording.
After completion of the recording, you can save the video in AVI video format.
Final Thoughts:
It is another capable lightweight screen recorder through which you can record the screen with or without audio.
Screen2AVI
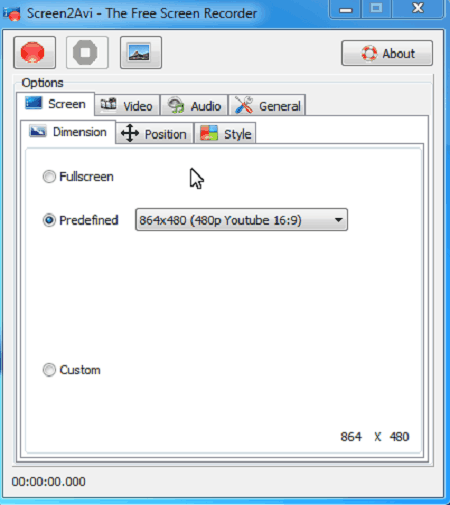
Screen2AVI is a free lightweight screen recorder software for Windows. Through this software, you can record the entire screen or any custom area of the screen. It also lets you record external audio with the screen. In it, you get multiple hotkeys to help you quickly start, pause, and stop the recording. Before initiating the screen recording, you can adjust the frame rate and compression settings of the video. Although, you cannot change the default recording format which is AVI. Now, follow the below steps to record screen using this lightweight screen recorder.
How to record screen using Screen2AVI:
- Start this software and go to the Screen tab to specify screen recording dimensions and position. You can also choose to record the entire screen.
- After that, go to the Video tab to specify the frame rate and compression method (Microsoft RLE, Intel IYUV codec, etc.).
- Next, go to the general tab and specify the destination location path.
- Lastly, press the Record button to start the screen recording.
Additional Feature:
- Snapshot: Using it, you can take screenshots of your screen during the recording process.
Final Thoughts:
It is a simple and effective lightweight screen recorder through which you can record as well as take snapshots of the screen.
Basic Screen Recorder
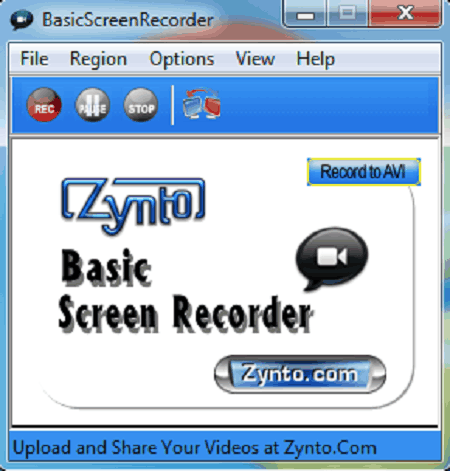
Basic Screen Recorder is another free lightweight screen recorder for Windows. Using it, you can easily record both the screen and audio at the same time. Plus, it lets you select a custom area of the screen for the recording. It also offers features to adjust the recording video frame rate and compression codec before starting the recording. After recording the screen, you can locally save it in AVI video format. Now, check out the below steps to record screen through this software.
How to record screen using Basic Screen Recorder:
- Launch this software and go to the Region tab to select the custom area of the screen or the entire screen.
- After that, go to Options > Video Options to specify the video compression codec (Cinepak Codec, Intel IYUV codec, etc.) and video frame rate value.
- If you also want to record audio, then go to Audio options and select the recording device.
- Lastly, press the Rec button to start the screen recording.
Final Thoughts:
It is a simple lightweight screen recorder software through which you can easily record the screen.
Extra Screen Capture Free
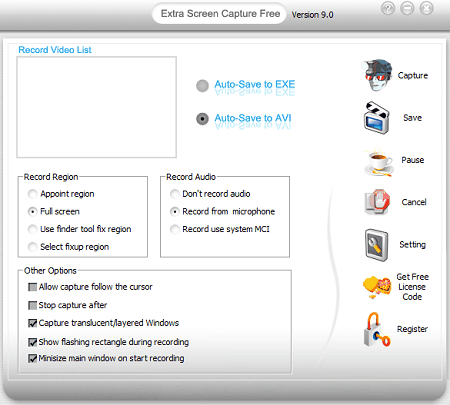
Extra Screen Capture Free is yet another free lightweight screen recorder software for Windows. Through this screen recorder, you can record the entire screen to a specific part of the screen. It also lets you enable/ disable sound recording. Besides this, other adjustments like recording frame rate, video quality, cursor (to enable/disable cursor from the recording), etc., are also present in it. The final screen recording can be saved in AVI and EXE formats. Now, check out the below steps to record screen through this lightweight screen recorder.
How to record screen using Extra Screen Capture Free:
- Start this software and go to Video Options to specify the recording frame rate and quality.
- After that, enable/ disable sound and cursor from the recording using Sound and Cursor options respectively.
- Next, select one of the two available recording formats namely AVI and EXE.
- Lastly, press the Capture button to start the recording process.
Final Thoughts:
It is another easy to use lightweight screen recorder that anyone can use with ease.
xvideocapture
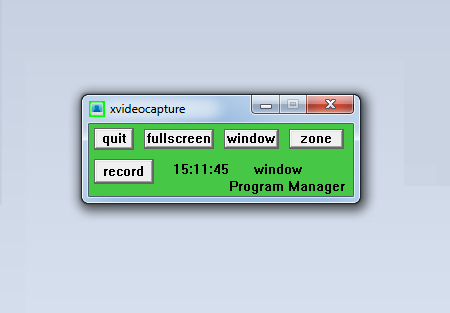
xvideocapture is a free open source and lightweight screen recorder software for Windows. It is a basic screen recorder software that allows you to record the entire screen, a window, or a custom screen area. After recording the screen, you can save it in AVI video format. This recorder does lack various common features like audio recording, recording parameter adjustment features (video resolution, video quality, video codec, etc.), etc.
How to record screen using xvideocapture:
- Start this software and select fullscreen (to select the entire screen), window (to select any specific window), or zone (to specify custom area).
- Lastly, press the record button to initiate the recording.
Final Thoughts:
It is one of the simplest lightweight screen recorders through which you can quickly record any specific area of the screen.
JScreenRecorder
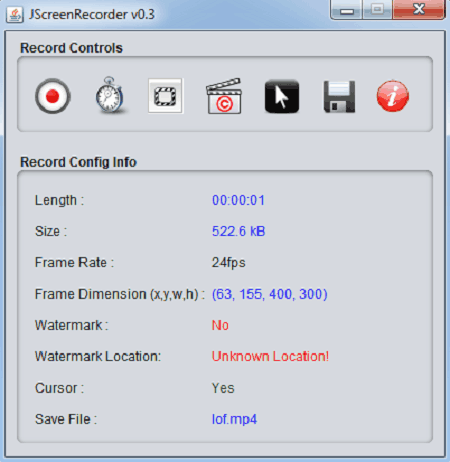
JScreenRecorder is a free open source and lightweight screen recorder software for Windows. It is a Java-based screen recorder that needs Java to run. Using it, you can easily record screen without audio. It also offers a capture area selector tool through which you can specify the area over the screen that you want to record. Other than that, you can specify the recording frame rate, enable/ disable cursor, and customize cursor for the recording. Now, check out the below steps to record screen through these lightweight screen recorder software.
How to record screen using JScreenRecorder:
- Start this software and click on the select capture area option to specify the recording area.
- After that, specify the recording frame rate and enable/ disable or customize cursor using Frame Rate and Select Cursor options.
- Next, click on the select save location option to specify the recording location and file name.
- In the end, hit the Start/Stop Recording button to initiate the recording.
This software saved the recording in AVI video format.
Additional Feature:
- Set Watermark: Using it, you can add a text watermark over the recording.
Final Thoughts:
It is another simple to use lightweight screen recorder that offers a good set of recording tools.
Weeny Free Video Recorder
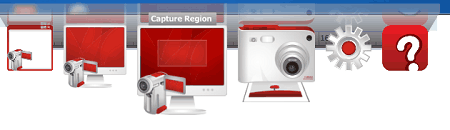
Weeny Free Video Recorder is the next free lightweight screen recorder for Windows. This recorder comes with a floating interface through which you can quickly record a window, entire screen, or custom area. Plus, various shortcuts to quickly start, stop, and pause the recording is also provided by it. It can also record the audio with the screen feed. A handy Settings section to adjust the recording frame rate, recording quality, video codec, etc., is also present in it.
How to record screen using Weeny Free Video Recorder:
- Start this software and go to Settings to specify all the recording parameters and enable audio if you want.
- Next, select one three available recording options from its interface to start recording namely Capture Window (to record a specific window), Capture Desktop (to record the entire screen), and Capture Region (to manually select and record a specific region of the screen).
- After recording the screen, you can save the recording in the WMV video format.
Additional Feature:
- Capture Camera: Through this feature, you can record the webcam feed.
Final Thoughts:
It is a beautifully designed lightweight screen recorder that anyone can use to record screen with audio.
ByteScout Screen Capturing
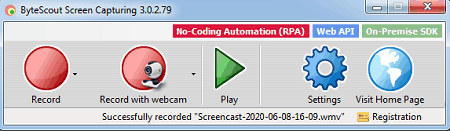
ByteScout Screen Capturing is another free lightweight screen recorder for Windows. It is another capable screen recorder that lets you record webcam feed with audio. It also offers flexibility to adjust the frame rate and recording video resolution. To record the screen, it offers three recording modes namely Rectangular Region (it allows you to select and record a rectangular region of the screen), Region Around the Mouse (it tracks and record all the nearby region to the cursor), and Full Screen (it records the entire screen). Now, check out the below screen recording steps.
How to record screen using byteScout Screen Capturing:
- Launch this screen recorder and go to settings to specify the recording frame rate and recording resolution. Besides this, you can also enable audio recording from settings.
- After that, select either the WMV or AVI recording format and press OK.
- Next, select one of the three available recording modes to start the screen recording process.
Final Thoughts:
It is a good lightweight screen recorder that offers a good set of screen and webcam recording features.
TakeScreen Recorder Lite
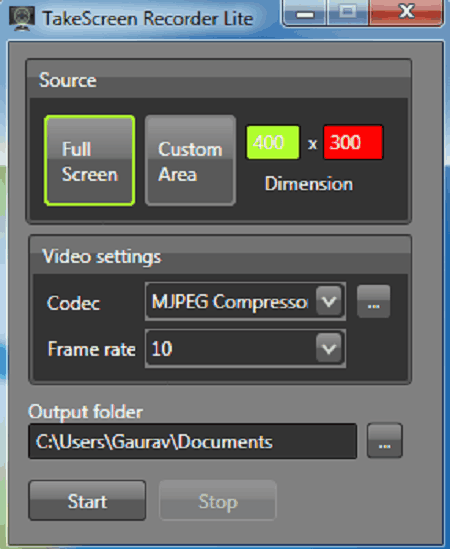
TakeScreen Recorder Lite is yet another free lightweight screen recorder software for Windows. It is a basic screen recorder that lets you record the screen without audio. Although, it still offers the feature to manually select and record a custom area of the screen. Apart from that, you can adjust the recording frame rate and video codec (DV Video Encoder, MPEG Compressor, etc.) before starting the recording process.
How to record screen using TakeScreen Recorder Lite:
- Start this software and adjust the recording frame rate and codec.
- After that, specify the recording location in the Output folder field.
- Next, select the Full Screen to record the entire screen or select the Custom Area option to select and record a specific area of the screen.
- Lastly, hit the Start button to initiate screen recording.
It saves the recording in AVI video format.
Final Thoughts:
It is another straightforward lightweight screen recorder that anyone can use without much hassle.
NemCap
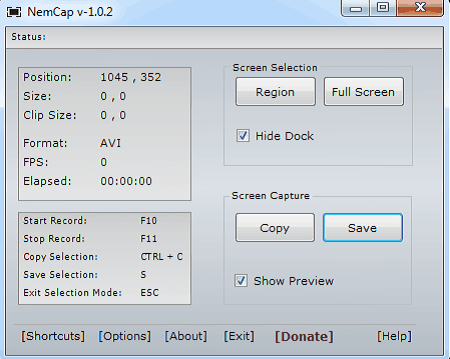
NemCap is another free lightweight screen recorder software for Windows. Through this software, you can record the custom area of the screen or the entire screen. Although, you will not be able to record audio with this software. To quickly start and stop recording, it also offers hotkeys namely F10 (to start recording) and F11 (to stop recording). The good thing about this software is its ability to save the recording in various video formats such as MP4, AVI, FLV, MOV, MPEG, and WMV.
How to record screen using NemCap:
- Start this software and go to Options to specify the recording format and recording location.
- After that, click on the Region button to select a custom area for recording or choose the Full-Screen option to select the entire screen for recording.
- Lastly, hit the Record button to initiate the recording.
Final Thoughts:
It is another capable lightweight screen recorder software through which you can record the screen without putting stress on your system.
SMRecorder
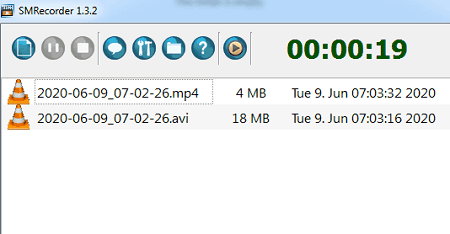
SMRecorder is another free lightweight screen recorder software for Windows. Through this software, you can record screen, desktop audio, and webcam feeds. However, you will not be able to record the custom screen area with this software as it only records the entire screen. Before starting the screen recording, you can adjust various recording parameters like recording frame rate, compression quality, video synchronization, etc. Now, follow the below steps to record the screen through this lightweight screen recorder.
How to record screen using SMRecorder:
- Start this recorder and click on the New Recording Task button.
- After that, select the Desktop Video mode from the Capture Type menu.
- Next, adjust the recording video and audio settings and press OK to save all settings.
- In the end, hit the Record button to initiate the screen recording.
To finish the recording, press the Stop button. As soon as you finish the recording, this software will process and save the recording in both AVI and MP4 video formats.
Limitation:
- This software shows ads on its interface.
Final Thoughts:
It is an easy to use lightweight screen recorder through which you can record screen, audio, and webcam feed.
SRecorder
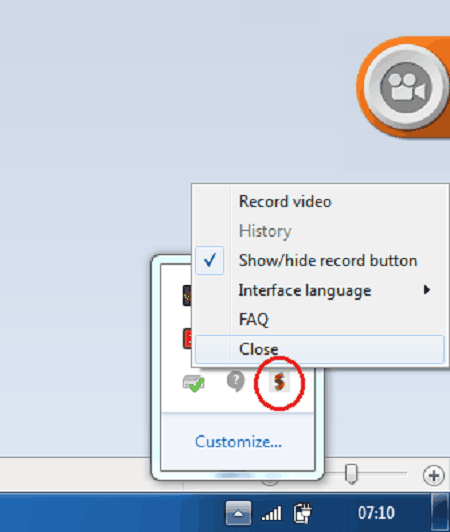
SRecorder is another free lightweight screen recorder software for Windows. It is a simple and intuitive screen recorder that lets you record the screen with or without audio. Plus, it allows you to select any part of the screen for the recording. It adds a side pullup icon on the screen that you can pull up at any time and start the screen recording.
How to record screen using SReorder:
- Start this software and pull up its icon from the side of the screen.
- After that, select an area over the screen that you want to record.
- Now, you will get an option to record audio or not.
- Lastly, press the Record button to start the recording.
After the completion of the screen recording, you can save it in the MP4 video format or upload them to their server.
Limitation:
- This software does not offer options to adjust the recording parameters.
Final Thoughts:
It is another easy to use lightweight screen recorder through which you can quickly record the screen.
Krut Computer Recorder
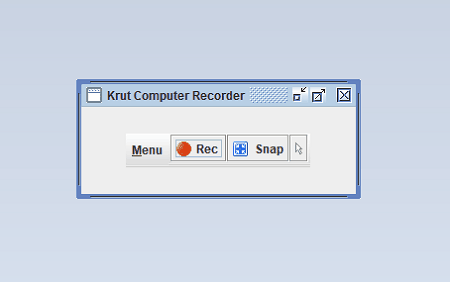
Krut Computer Recorder is another free lightweight screen recorder software for Windows. Through this screen recorder, you can record custom screen area and area around the cursor. Plus, options to record audio, adjust recording frame rate, and video encoding quality are also present in it. Now, check out the below steps to record the screen.
How to record the screen using Krut Computer Recorder:
- Start this software and go to Menu > Settings to specify the recording frame rate, recording location, audio recording, etc.
- After that, go to its main interface and select the cursor icon to manually specify the recording area.
- Next, hit the Rec button to initiate the screen recording. After the completion of the recording press the Stop button to save the recording in MP4 video format.
Final Thoughts:
It is another good lightweight screen recorder through which you can easily record any part of the screen with or without audio.
Webineria
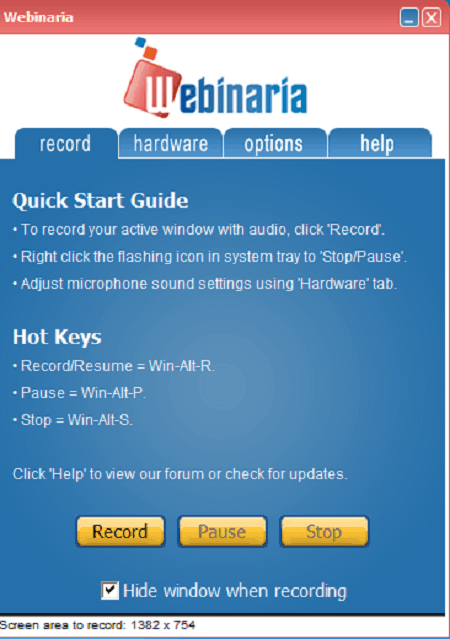
Webineria is a free open source and lightweight screen recorder software for Windows. It is basically a recording utility through which you can record screen, webcam, and audio without much hassle. In the case of screen recording, it also lets you select the custom screen area form the recording. Plus, simple hotkey combinations to perform basic recording activities are also present in it such as WIN+ALT+R (to record or resume the recording), WIN+ALT+P (to pause the recording), etc. Now, check out the below steps.
How to record screen using Webineria:
- Start this software and go to Options to specify the recording frame rate and full-screen or custom screen recording option.
- After that, go to Audio to configure the audio device, if you also want to record the audio.
- Lastly, hit the Record button to initiate the screen recording.
After recording the screen, you can save the recording in AVI video format.
Final Thoughts:
It is a straightforward lightweight screen recording software through which you can also record webcam and microphone feeds.
Easy Screencast Recorder
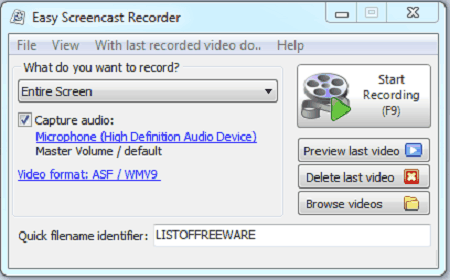
Easy Screencast Recorder is a free portable and lightweight screen recorder software for Windows. It is another easy to use screen recorder through which you can record a specific window, entire screen, or custom screen area. Plus, it also lets you record audio with the screen feed. I also like its ability to save the recording in multiple video formats such as ASF, FLV, MKV, WEBM, MPEG, etc. The process to record the screen is also quite simple. You can follow the below steps to record screen through this lightweight screen recorder.
How to record screen using Easy Screencast Reorder:
- Launch this software and go to View > Options and Preference to specify the recording video format, video codec engine, compression quality, etc.
- After that, select one of the three available recording methods namely Selected region, selected window object, and entre screen.
- Lastly, press the Start Recording button to initiate the recording process.
Additional Feature:
- Preview Player: It is an internal video player of this software in which you can preview recordings.
Final Thoughts:
It is another good lightweight screen recorder that you can use to record screen with audio.
Acala Screen Recorder

Acala Screen Recorder is another free lightweight screen recorder software for Windows. It is a simple screen recorded utility through which you can record any part of the screen. It also offers various hotkeys to further simplify the recording process such as F2 to start/ pause recording, F3 to stop/ save video, F4 to cancel the recording. Now, follow the below steps to record the screen through this lightweight screen recorder.
How to record screen using Acala Screen Recorder:
- Launch this screen recorder and select one of the two available recording formats namely EXE and AVI.
- After that, click on the Record button and specify the area over the screen through cursor to start recording.
- After the completion of recording, press the Stop button to save the video.
Limitations:
- This screen recorder does not offer features to adjust the recording parameters and neither supports audio recording.
Final Thoughts:
It is a decent lightweight screen recorder through which you can record the screen without putting stress on your system.
Screen View!
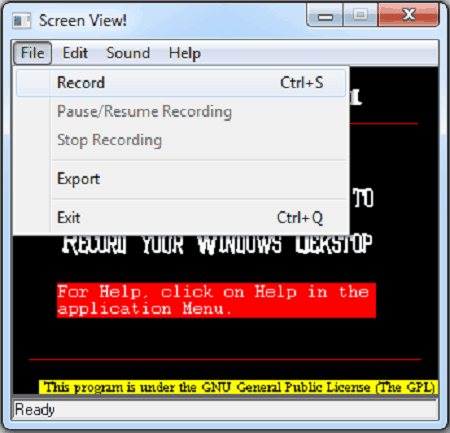
Screen View! is a free portable and lightweight screen recorder for Windows. Using it, you can capture the entire screen. Plus, it also lets you select an audio device to record sound along with the screen. After recording the screen, you can save it in AVI and MPEG video formats. The only downside of this recorders is its inability to record custom screen area, unlike most other screen recorders.
How to record screen using Screen View!:
- Launch this screen recorder and go to the Sound section to enable sound recording and specify recording sound levels.
- After that, go to File and hit the Record button to start the screen recording.
- Once the recording gets completed, use its Export option to save the final video.
Final Thoughts:
It is a straightforward lightweight screen recorder that anyone can easily use.
Pure Java Screen Recorder

Pure Java Screen Recorder is another free lightweight screen recorder software for Windows. It is a Java-based screen recorder that needs Java to run. Using it, you can record the entire screen with audio. It is capable of recording the screen in up to 15 FPS and mouse movements of up to 30 FPS. Now, check out the below steps to record screen through this software.
How to record screen using Pure Java Screen Recorder:
- Start this software and specify the recording format (AVI), Frame Rate, Recording Color Range, etc.
- After that, hit the start button to initiate the recording.
Final Thoughts:
It is another simple to use lightweight screen record through which you can record the entire screen with or without audio.


Naveen Kushwaha
Passionate about tech and science, always look for new tech solutions that can help me and others.
About Us

We are the team behind some of the most popular tech blogs, like: I LoveFree Software and Windows 8 Freeware.
More About UsArchives
- May 2024
- April 2024
- March 2024
- February 2024
- January 2024
- December 2023
- November 2023
- October 2023
- September 2023
- August 2023
- July 2023
- June 2023
- May 2023
- April 2023
- March 2023
- February 2023
- January 2023
- December 2022
- November 2022
- October 2022
- September 2022
- August 2022
- July 2022
- June 2022
- May 2022
- April 2022
- March 2022
- February 2022
- January 2022
- December 2021
- November 2021
- October 2021
- September 2021
- August 2021
- July 2021
- June 2021
- May 2021
- April 2021
- March 2021
- February 2021
- January 2021
- December 2020
- November 2020
- October 2020
- September 2020
- August 2020
- July 2020
- June 2020
- May 2020
- April 2020
- March 2020
- February 2020
- January 2020
- December 2019
- November 2019
- October 2019
- September 2019
- August 2019
- July 2019
- June 2019
- May 2019
- April 2019
- March 2019
- February 2019
- January 2019
- December 2018
- November 2018
- October 2018
- September 2018
- August 2018
- July 2018
- June 2018
- May 2018
- April 2018
- March 2018
- February 2018
- January 2018
- December 2017
- November 2017
- October 2017
- September 2017
- August 2017
- July 2017
- June 2017
- May 2017
- April 2017
- March 2017
- February 2017
- January 2017
- December 2016
- November 2016
- October 2016
- September 2016
- August 2016
- July 2016
- June 2016
- May 2016
- April 2016
- March 2016
- February 2016
- January 2016
- December 2015
- November 2015
- October 2015
- September 2015
- August 2015
- July 2015
- June 2015
- May 2015
- April 2015
- March 2015
- February 2015
- January 2015
- December 2014
- November 2014
- October 2014
- September 2014
- August 2014
- July 2014
- June 2014
- May 2014
- April 2014
- March 2014
